How to Check and Replace Brake Pads Yourself
How to check and replace brake pads yourself A step-by-step guide to inspecting and changing worn brake pads safely at home Save money with this DIY car maintenance tutorial.
Learning how to check and replace brake pads yourself is an essential skill for any car owner looking to save money and maintain their vehicle’s safety. Brake pads are a critical component of your braking system, and worn-out pads can lead to longer stopping distances, noisy braking, and even damage to your rotors. By performing regular inspections and timely replacements, you can ensure optimal braking performance and avoid costly repairs. This guide will walk you through the entire process, from identifying wear signs to installing new pads with confidence.
Whether you’re a DIY enthusiast or a beginner, understanding how to check and replace brake pads yourself gives you greater control over your car’s maintenance. With just a few basic tools and some patience, you can complete this task at home without needing a mechanic. We’ll cover everything from safety precautions to step-by-step instructions, helping you keep your brakes in top condition for a smoother and safer driving experience. Let’s get started.
How to Check and Replace Brake Pads Yourself
Signs Your Brake Pads Need Replacement
Before diving into the replacement process, it’s important to recognize the warning signs of worn brake pads. Squealing or grinding noises when braking often indicate that the pads are thin. A vibrating brake pedal or longer stopping distances may also suggest excessive wear. Some modern vehicles have wear indicators that trigger a dashboard warning light. Visual inspection is the most reliable method if the pad material is less than ¼ inch thick, replacement is necessary.
Tools and Materials Needed
To replace brake pads, you’ll need a few essential tools: a jack and jack stands, a lug wrench, a C-clamp or brake caliper tool, a wrench set, and new brake pads. Additionally, brake cleaner, anti-seize lubricant, and gloves will help ensure a smooth process. Always refer to your vehicle’s manual for specific torque specifications and pad compatibility.
Step-by-Step Brake Pad Replacement Process
Lift the Vehicle Safely
Always park on solid, level ground and engage the parking brake before lifting your vehicle. Loosen lug nuts slightly while the car is still on the ground, then use a quality jack to lift and immediately support it with jack stands never rely solely on the jack for safety.
Remove the Wheel
With the vehicle securely supported on jack stands, fully remove the loosened lug nuts by hand. Carefully pull the wheel straight off the hub to expose the brake components, setting it aside in a safe spot where it won’t roll away.
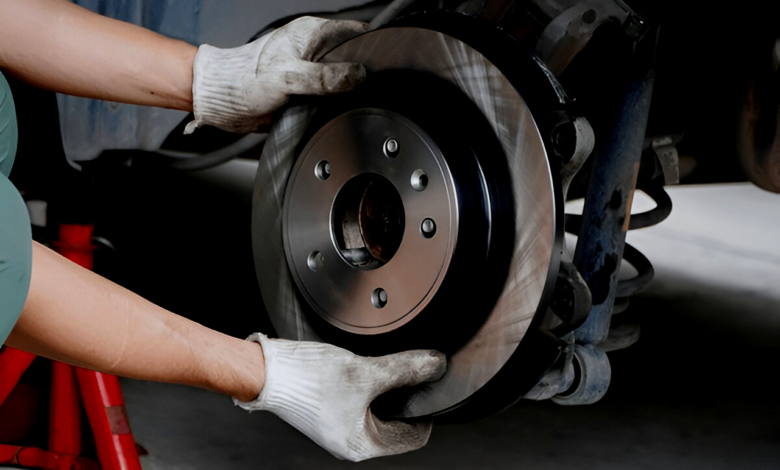
Inspect the Brake Caliper and Rotor
Inspect the rotor surface for scoring, grooves, or uneven wear patterns that exceed manufacturer specifications. Test the caliper’s sliding movement – any stiffness or binding indicates needed servicing before reassembly.


Remove the Caliper
Use the correct size wrench to remove the caliper’s mounting bolts completely. Gently rock the caliper free from its bracket, then secure it to the suspension with a bungee cord to prevent stress on the brake hose.
Take Out the Old Brake Pads
Carefully remove the worn brake pads from the caliper bracket, paying attention to their position and any included shims. Take a quick photo or make mental notes of their exact orientation to ensure correct installation of the replacement pads.
Compress the Caliper Piston
Place a C-clamp or piston tool against the caliper piston with an old brake pad as protection. Slowly tighten the clamp until the piston fully retracts into its bore, creating clearance for the new, thicker pads.
Install New Brake Pads
Align the new brake pads precisely with the caliper bracket and slide them into position until fully seated. Apply a thin layer of high-temperature brake lubricant to the backing plates’ contact points and shims to prevent squealing and ensure smooth operation.
Reattach the Caliper
Carefully position the caliper over the new brake pads, ensuring proper alignment before sliding it completely into place. Securely fasten the mounting bolts, using a torque wrench to tighten them to your vehicle’s exact specified values for safe operation.
Reinstall the Wheel and Lower the Vehicle
Put the wheel back on, hand-tighten the lug nuts, lower the car, and then torque the lug nuts properly in a star pattern.
Test the Brakes
Firmly press the brake pedal repeatedly until it feels solid to restore proper hydraulic pressure in the system. Conduct a low-speed test drive in an empty parking lot, making several gentle stops to verify smooth, even braking performance before normal driving.
Maintenance Tips for Longer Brake Pad Life
Proper brake maintenance significantly extends the life of your braking system. Avoiding sudden, hard stops minimizes pad wear, while periodic cleaning of brake components prevents debris from causing uneven wear or noise. Regularly checking and replacing brake fluid ensures optimal hydraulic pressure and prevents moisture-related corrosion. For comprehensive safety, have a professional inspect your entire braking system annually to catch potential issues before they become serious problems. These simple habits will keep your brakes responsive and reliable for years to come.
Common Mistakes to Avoid
One of the most common mistakes when replacing brake pads is forgetting to compress the caliper piston before installing new, thicker pads. This oversight prevents the caliper from properly fitting over the new pads, potentially causing brake drag or failure. Similarly, improper torque on caliper bolts either too tight (risking stripped threads) or too loose (causing caliper movement) compromises braking safety. Many DIYers also overlook inspecting the rotors; installing new pads on worn or grooved rotors leads to vibration, noise, and accelerated pad wear.
When to Seek Professional Help
If your vehicle exhibits persistent brake problems such as pulling to one side during braking, a spongy or sinking pedal, or visible fluid leaks it’s best to consult a professional mechanic. These symptoms often indicate deeper issues within the braking system, such as stuck calipers, air in the brake lines, or failing master cylinders. While basic pad replacement is manageable for most DIYers, more complex repairs require specialized tools and expertise to ensure proper function and safety. A certified technician can accurately diagnose and resolve these problems, preventing potential brake failure and maintaining optimal stopping performance.
Read More: Renting vs Buying in the UK What’s Better in 2025?
Conclusion
Now that you’ve learned how to check and replace brake pads yourself, you can confidently maintain your vehicle’s braking system and ensure safe, reliable performance. Regular inspections and timely replacements not only extend the life of your brakes but also prevent costly damage to rotors and calipers. By following the steps outlined in this guide, you’ve gained a valuable skill that saves money and keeps you in control of your car’s maintenance.
Mastering how to check and replace brake pads yourself is a rewarding DIY achievement that enhances both your driving safety and mechanical know-how. Remember to always prioritize safety, use quality parts, and test your brakes thoroughly before hitting the road. With this knowledge, you’ll be better prepared to handle brake maintenance and enjoy smoother, more responsive stopping power for miles to come.
FAQs
How often should I replace my brake pads?
Brake pads typically last 30,000–70,000 miles, but driving habits and conditions affect their lifespan.
Can I replace just one brake pad?
No, always replace brake pads in pairs (both front or both rear) to ensure even braking performance.
Do I need to replace rotors with brake pads?
Not always, but if rotors are warped or heavily grooved, they should be resurfaced or replaced.
Why are my new brakes squeaking?
Some brake pads have a break-in period. If squeaking persists, check for improper installation or contamination.
Is it safe to drive with worn brake pads?
No, worn pads reduce braking efficiency and can damage rotors, leading to costly repairs. Replace them immediately.